
REVIEW · MILKY WAY & ASTROPHOTOGRAPHY TOURS
Milky Way Photography in Arches National Park
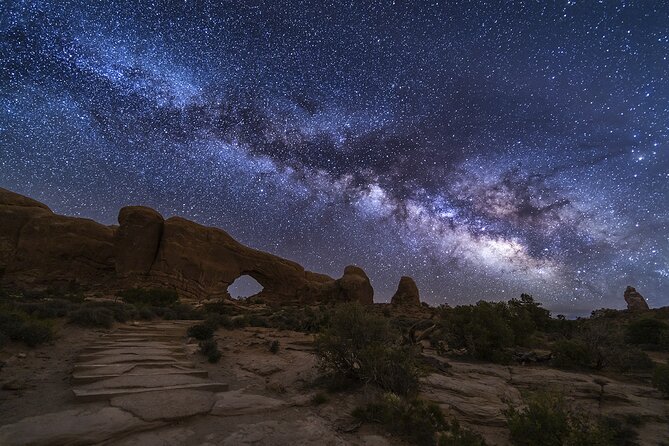
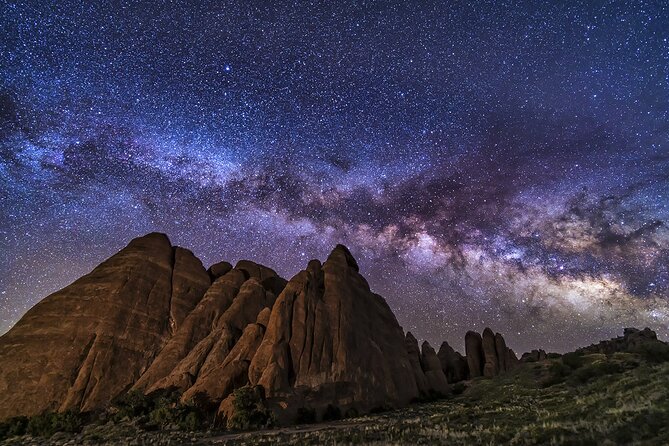
Arches National Park after dark is a different world. The red-rock formations fade into silhouettes, stars fill the sky, and the Milky Way becomes the main subject. This small-group outing gives you a practical lesson in photographing it, then takes you to at least two night locations inside the park.
I like the hands-on help from Colin Young and Geremy, especially for first-time night photographers. I also like the small maximum of four people, the snacks and refillable water, and the chance to work on composition rather than simply stop for a quick look. The main catch is timing: spring departures can begin very late, and the tour requires specialized camera gear and a moderate level of fitness.
Key points to know before booking
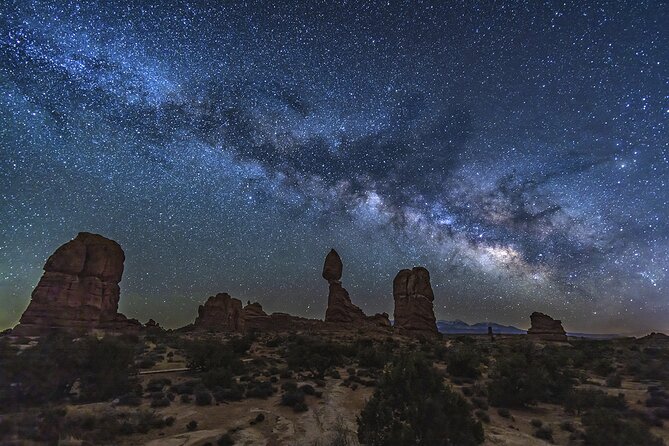
- At least two Arches locations: You move beyond one roadside viewpoint and get more than one chance to frame the Milky Way.
- Practical camera instruction: You receive help with ISO, focus, aperture, exposure, and composition for a DSLR or mirrorless camera.
- Small group size: The maximum is four people, allowing for personal guidance at the camera and tripod.
- Seasonal timing matters: From March through May, the Milky Way may not appear until after midnight, so pickup is late at night.
- Bring serious equipment: A sturdy tripod, a wide lens, and a camera that can shoot at least ISO 3200 are strongly recommended.
- The setting is the star: Arches is an internationally recognized dark-sky park, so the night sky is central to the outing, not an afterthought.
Why Arches after dark is worth the late hour
Most people first meet Arches National Park in bright sun, when the sandstone glows orange and every arch is easy to see. At night, the park asks you to slow down. Your eyes adjust, the familiar forms become dark shapes, and the sky takes over.
That change is the point of this tour. You are not simply being driven to a scenic overlook for a few minutes. You are learning how to make a long-exposure photograph in a place where the stars can actually show up clearly.
Arches is an internationally recognized dark-sky park, which matters for night photography. Dark skies give your camera a better chance of recording the Milky Way without the orange haze and washed-out stars found near large cities. If you live in an urban area, the difference can be startling.
The tour lasts about three and a half hours. That is enough time for a short camera lesson, travel within the park, setup at more than one location, and adjustments between photographs. Night photography is rarely instant. You need time to place the tripod, find focus in the dark, test an exposure, inspect the result, and try again.
More Milky Way and Astrophotography Tours in the USA:
- Mauna Kea: Stargazing Experience with Free Photos
★ 4.2 · 32 reviews - Stargazing and Milky Way Portrait in Capitol Reef National Park
★ 4.5 · 13 reviews - Milky Way Photography Workshop in Acadia National Park
★ 5.0 · 8 reviews
Learning the camera settings before the first photograph
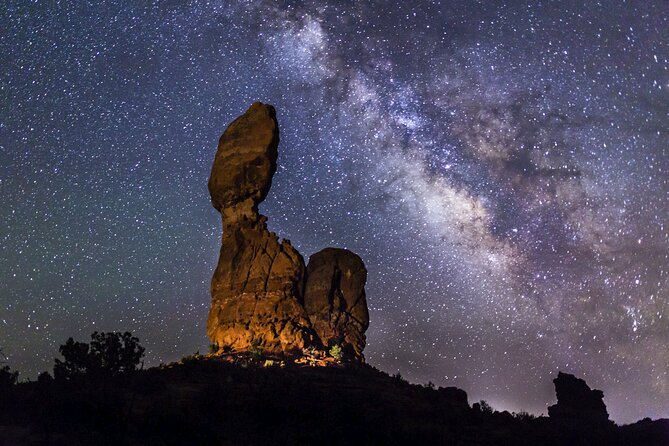
The guide begins with a crash course in the basic settings used for Milky Way photography. This is valuable even if you have used your camera for years, because night work changes the usual rules.
You will need to work with a high ISO, a wide aperture, and a long exposure. Your camera must be able to shoot at least ISO 3200. A wide lens is also important. The recommended range is about 14mm to 35mm on a full-frame camera, or 10mm to 24mm on a crop-sensor model. The lens should open to at least f/3.5 or wider.
Those numbers are not random. A wide lens lets you include more sky and more of an arch or rock formation in the same frame. A wider aperture lets in more starlight. A camera with good high-ISO performance gives you a better chance of recording the stars without excessive digital noise.
You will also need a sturdy tripod. A flimsy tripod can shake in the breeze or when you touch the camera, turning stars into soft streaks and rock formations into fuzzy shapes. A headlamp or flashlight is useful for moving around and checking your gear. A red-light setting is best because it is less disruptive to your night vision.
One especially useful touch is the chance to prepare your camera before the outing. Colin has sent setup instructions in advance, giving you a starting point before the sky gets dark. That can save time on site, particularly if you are not fully comfortable with manual controls.
The instruction is not limited to a list of settings. Colin and Geremy can help with camera-specific questions and composition. That distinction matters. A technically correct photograph can still feel flat if the arch, rock, and Milky Way are poorly placed in the frame.
Working at two Arches locations
The stated plan includes at least two locations in Arches National Park. The exact spots can vary, so you should not expect a fixed list of named viewpoints. That flexibility can help the guide respond to conditions and choose places that give you useful compositions.
At the first stop, you will likely spend time getting your gear ready and learning the basic rhythm of the shoot. In the dark, even familiar equipment can be awkward. You need to extend the tripod legs, mount the camera, set focus, and compose without relying on ordinary daylight vision.
The guide can help you think about the foreground as well as the sky. A Milky Way photograph is stronger when the rock formation gives it a sense of place. Arches provides that connection naturally, with sandstone shapes that can appear almost graphic against the stars.
The second location gives you another chance to solve the same problem in a new way. You might find a different balance between sky and rock, or use a distinct formation to create a more dramatic frame. If your first exposure is not right, the second stop provides room to correct it.
This is also where the small group helps. With no more than four people, you are not competing with a crowd for the guide’s attention or squeezing your tripod into a busy line. The setting remains quiet and practical, with enough personal help to ask about focus, exposure, or composition.
The tradeoff is that this is still an outdoor night outing. You should expect darkness, uneven ground, and the need to carry and manage your own equipment. A moderate fitness level is required, and the tour is not recommended if you have poor night vision.
What Colin Young and Geremy add
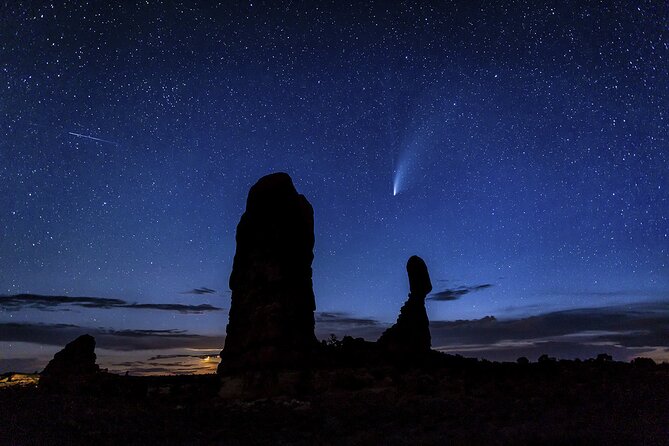
Colin Young leads the photo instruction, and Geremy may also serve as a guide. Their roles go beyond pointing out a place to stand. They can help you understand the camera controls and make better use of the scenery around you.
Colin is also familiar with the park’s geology, history, and natural features. That gives the night setting more meaning. You are not only photographing anonymous rocks under a starry sky. You are working with the shapes and story of Arches itself.
The strongest part of the teaching style is its patience. If you are new to photo tours, you do not need to arrive with a polished understanding of manual exposure. The instruction is designed to get you started, and help is available as you test the settings.
That said, your results will still depend on your equipment and preparation. The guide cannot turn a phone with limited night controls into a professional camera, and no tour can guarantee a perfect photograph. Bring the recommended lens and tripod, read the setup information in advance, and learn a few basic controls before pickup. You will get more from the time in the park.
More National Park Stargazing in the USA:
- Sedona Stargazing Tours LLC
★ 4.5 · 881 reviews - The Original Sedona UFO and Stargazing Night Tour
★ 4.5 · 269 reviews - The Night Sky Star Story, Galaxy, and Sedona Story Tour
★ 4.5 · 243 reviews - Sedona: Nighttime UFO & Stargazing Tour
★ 4.4 · 148 reviews
Seasonal timing changes the entire outing
The timing is one of the most important points to understand before booking. From March through May, the Milky Way does not appear until after midnight. During those months, the outing is offered as a late-night standalone tour, with pickup taking place in the early morning hours.
That schedule may work well if you are comfortable staying up late and have another quiet day planned afterward. It can be a poor fit if you need an early start for a sunrise hike or a long drive. Night photography rewards patience, but it also takes energy.
In the fall, the guide offers a combined sunset and night tour instead. This gives you a broader evening of photography, moving from the warm light of sunset into the darker hours. The seasonal format means you should check the available date carefully rather than assume every month follows the same schedule.
The timing also affects what you should eat and bring. Snacks such as granola bars or trail mix are supplied, including gluten-free options, and a cooler of ice water is available for refilling reusable bottles. That is useful during a long night, but you should still arrive prepared for the hours ahead.
Cameras, phones, and the gear question
This outing is designed for DSLR and mirrorless cameras, not for people expecting a camera to be supplied. You need to bring your own device. The guide may be able to loan you a spare tripod, but that is not guaranteed, so confirm before relying on it.
Your basic kit should include:
- A DSLR or mirrorless camera capable of shooting at least ISO 3200
- A wide-angle lens, ideally 14mm to 35mm on full frame or 10mm to 24mm on a crop sensor
- A lens that opens to f/3.5 or wider
- A sturdy tripod
- A headlamp or flashlight, preferably with a red setting
- A reusable water bottle
Late-model iPhones and other advanced phone cameras may be able to capture the Milky Way. Still, phone results vary, and the instruction is built around cameras with manual controls. If you only have a basic cell phone, you can still enjoy the night setting and the park, but you should not book expecting the same instruction or image quality as someone using a DSLR or mirrorless camera.
The best preparation is simple. Charge the batteries, clear space on your memory card, bring a spare battery if you have one, and practice changing ISO, aperture, and focus before the outing. Those details are practical preparation rather than extra homework. They leave you more time to enjoy the sky.
Is $275 a fair price?
The price is $275 per person, which is a serious expense for a three-and-a-half-hour activity. The value depends heavily on how much help you want and how much you already know.
If you are an experienced night photographer with your own location knowledge, tripod, and camera skills, you may find the price harder to justify. You could prefer to work alone and set your own pace.
For a first photo tour, the calculation looks better. You are paying for a small group, access to at least two locations in a dark-sky park, practical instruction, guidance with composition, snacks, water, and the time saved by not having to work out the park and camera process alone.
The maximum group size of four is important here. A larger group would spread the instruction thin. With four people or fewer, you have a better chance of getting direct help when your focus will not lock, your stars look soft, or your composition needs a small change.
Group discounts are available, and pickup is offered. The listed meeting point is the Moab Information Center at 25 East Center Street, with the activity ending back there. Since pickup and the meeting point are both mentioned, confirm the exact arrangement when your booking is accepted.
The activity is often booked about 57 days ahead. That suggests you should not wait until the last minute if this is a major part of your Moab plans. Confirmation is sent within 48 hours, subject to availability.
Who should book this night tour?
I would recommend it most strongly to you if you meet three conditions: you want to photograph the Milky Way, you have suitable equipment, and you are willing to stay out late.
It is a good match for:
- First-time night photographers who want clear, patient instruction
- DSLR and mirrorless owners who know basic controls but need help with astrophotography
- Couples or small groups who prefer personal guidance
- People who want both technical help and context about Arches
- Photographers who value composition advice, not just camera settings
It may not suit you if you have poor night vision, dislike uneven outdoor conditions, or want a casual sightseeing trip with no equipment. It is also not ideal if you expect to borrow a camera. Cameras are not supplied, and a phone may have limited results.
People in the group who do not have cameras can still enjoy the outing, but the main purpose remains photography. If everyone in your party wants a serious camera lesson, bring compatible equipment for each person.
Booking, cancellation, and planning advice
You can cancel up to 24 hours before the outing for a full refund. Since this is a small operation and availability can change, keep an eye on your confirmation and respond promptly if the guide contacts you about dates.
One past scheduling problem involved a calendar that had not been updated before a booking was accepted. The guide apologized, offered other dates, and helped identify another professional guide for the requested date, but the situation still caused frustration because other plans had been arranged around the tour. I would confirm the date soon after booking and avoid building an entire itinerary that depends on one late-night activity until your place is confirmed.
Plan a restful morning after the outing, especially for a spring departure after midnight. Bring warm layers if needed for the season, water, snacks if you want more than the supplied food, and a light that will not ruin your night vision.
Should you book Milky Way Photography in Arches?
Book it if you want more than a starry-sky stop and are ready to use your own camera. The strongest reasons are the four-person maximum, the practical instruction from Colin Young and Geremy, the chance to photograph at least two places, and the setting itself.
I would be cautious if you are not comfortable with late hours, do not own suitable gear, or want a guaranteed result. Night skies and camera conditions require patience, and the tour cannot replace preparation.
For the right photographer, $275 buys a focused evening in one of the best-known dark-sky parks in the United States, plus the guidance to make the most of it. For a complete beginner, it can turn a confusing camera menu into a workable night photograph. That makes it a worthwhile choice for a small group that treats the Milky Way as the main event.
FAQ
Where does the tour start and end?
The tour starts at the Moab Information Center, 25 East Center Street, Moab, Utah. It ends back at the meeting point.
How long does the experience last?
The outing lasts approximately 3 hours and 30 minutes.
How many people can join?
The maximum group size is four people.
What camera do I need?
You should bring a DSLR or mirrorless camera capable of shooting at least ISO 3200. Late-model iPhones and other advanced cell phone cameras may also be able to capture the Milky Way.
What lens is recommended?
A wide-angle prime or zoom is recommended. The suggested range is about 14mm to 35mm on a full-frame camera, or 10mm to 24mm with a crop sensor. The lens should open to at least f/3.5 or wider.
Do I need to bring a tripod?
You should bring a sturdy tripod. The guide may be able to loan a spare tripod, but this is not guaranteed.
What else should I bring?
Bring a headlamp or flashlight, preferably one with a red setting, along with your own camera and a reusable water bottle. Snacks and refillable ice water are provided.
What happens from March through May?
During March through May, the Milky Way does not appear until after midnight. The activity is offered as a standalone late-night tour during that period, with pickup beginning late at night.
More Photo Sessions in the USA
- Mauna Kea Stargazing Experience + Photos
★ 5.0 · 261 reviews - Night-Time Snorkel at TurtleTown with Stars, Lights, and Photos
★ 5.0 · 126 reviews - Moab: The Windows Astro-Photography and Stargazing Hike
★ 4.8 · 36 reviews - Night Sky Private Photo Tour
★ 5.0 · 8 reviews
Just added around the USA
- Private Under the Stars Night-Time Tour of DC (Up to 5 Guests)★ 5.0 · 24 reviews
- Stargazing and Milky Way Portrait in Capitol Reef National Park★ 4.5 · 13 reviews
- Temecula Wine Country Stargazing Tour★ 5.0 · 2 reviews
- Skyway Light Show Tour Under the Stars★ 5.0 · 5 reviews
- Astronomy and Stargazing Tour in Utah★ 5.0 · 8 reviews
- PRIVATE Sedona Jeep Tour 4X4 Stargazing Tour at Night★ 4.5 · 11 reviews
- Sunset Sedona Sacred Places -gourmet picnic dinner and stargazing★ 5.0 · 12 reviews
- Private Stargazing – Sequoia National Park★ 4.5 · 14 reviews
Milky Way & Astrophotography Tours, compared.
Mauna Kea: Stargazing Experience with Free Photos
Read our review →
Milky Way, Shark City Island, Beach and Rock Island Tour
Read our review →
Stargazing and Milky Way Portrait in Capitol Reef National Park
Read our review →
Milky Way Photography Workshop in Acadia National Park
Read our review →
Mount Bromo Milky Way Photography and Sunrise Private Tour (1D1N)
Read our review →
Milky Way Sanctuary Stargazing Tour at Pangue Observatory
Read our review →Browse the lists this tour appears in